Brood War / WeiJia autosave coaching package. Source: weijia-autosave-2026-06-03.zip.
WeiJia Brood War Coaching Package
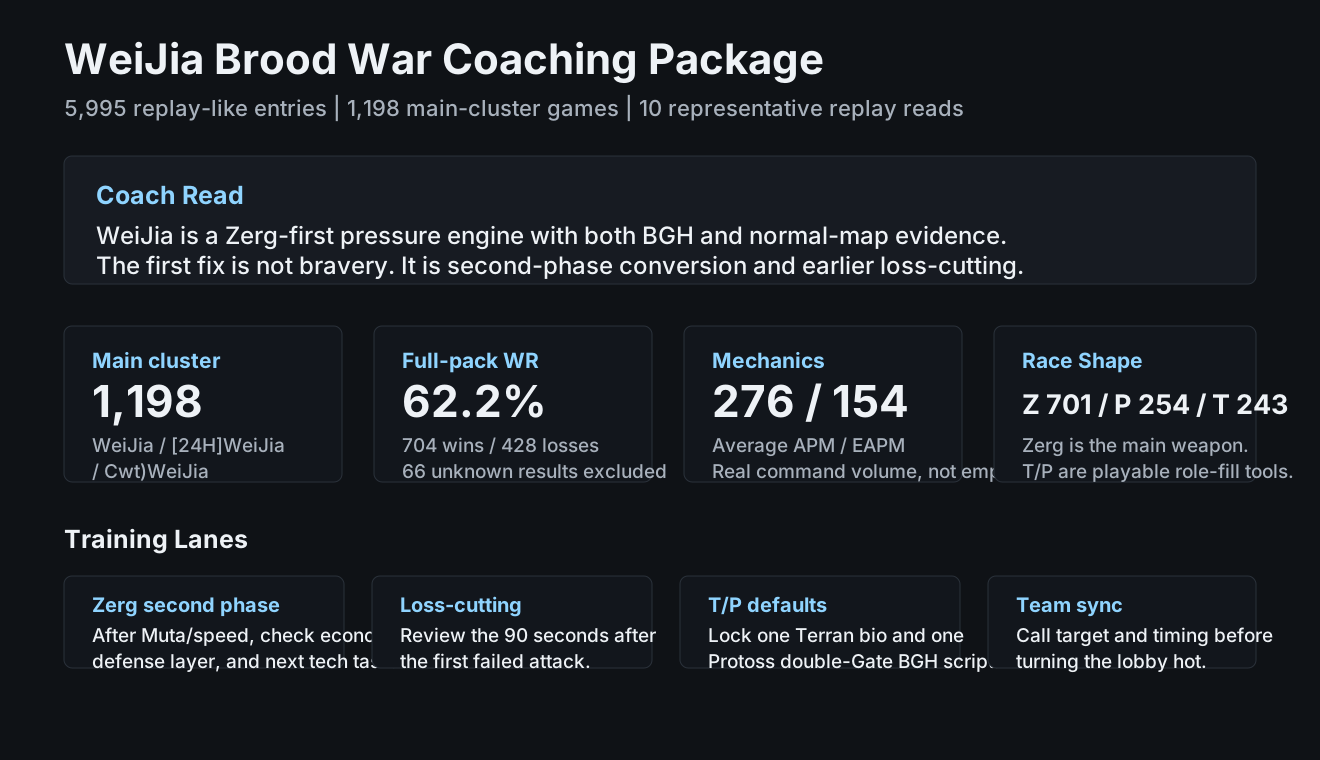
This package ingested 5,995 replay-like entries, identified 1,198 main-cluster games, and selected 10 representative replays for coaching review.
Coach Read
WeiJia is not just a BGH lobby player. The pack has heavy BGH volume plus Fighting Spirit, 투혼, Python, and Polypoid evidence. The profile is a Zerg-first, high-tempo player with playable off-races. The first fix is not bravery. It is cleaner second-phase conversion after early pressure and earlier loss-cutting when the first wave does not work.
Profile
WeiJia, [24H]WeiJia, and Cwt)WeiJia. MonsterKid is not merged because the race/APM profile looks like a separate regular player.
704 wins / 428 losses. 66 unknown results excluded from rate.
Average APM / EAPM. Real command volume, not empty speed.
Zerg 701; Protoss 254; Terran 243. Zerg is the main weapon; T/P are playable role-fill tools.
Training Priorities
| Priority | Issue | Training Method |
|---|---|---|
| 1 | The first pressure wave is strong, but the second phase after advantage can be cleaner. | After every speedling or Mutalisk advantage, check drone count, Overlord position, defense layer, and next tech task. |
| 2 | In losses, the same aggression can become expensive when the first wave is held. | Review the first 90 seconds after a failed attack: continue, drone, defend, switch lane, or wait for teammate timing. |
| 3 | T/P are playable but need clearer default scripts. | Lock one Terran bio BGH template and one Protoss double-Gate Dragoon BGH template. |
| 4 | High-pressure players can heat up the lobby before teammates are ready. | Before the first real push, call the target and timing so allies know what to follow. |
10 Representative Replay Reads
1. BGH 3v3 | WeiJia Protoss | 30:07 Win
Pylon at 0:48, Gateway at 1:17, second Gateway at 1:42, Cyber Core at 2:25, Dragoon at 3:23, Dragoon range at 3:24. This proves his Protoss is not cosmetic. It can provide real midgame frontal firepower through double-Gate into Dragoon range.
Coach point: Keep this as the Protoss BGH role-fill template. If the game survives past 8 minutes, declare the next role: Dragoon front, Templar transition, or defensive anchor.
2. BGH 3v3 | WeiJia Zerg | 25:22 Loss
Pool at 1:06, Extractor at 1:25, speed at 2:18, Hatchery at 3:01, Lair at 6:00. The opening intent is clear. The loss shape says the second layer after the held first wave needs more discipline: economy, tech, and defense cannot rely on pure pressure instinct.
Coach point: After the first failed wave, run a 90-second loss-cutting check. Continue, switch into Mutas, drone, defend, or wait for an ally. Do not decide only by feel.
3. BGH 3v3 | WeiJia Zerg | 20:15 Win
Pool at 1:22, Extractor at 1:34, speed at 2:33, Lair at 4:03, Spire at 5:25, Mutalisks at 6:46. This is the natural WeiJia Zerg line: open the map with speed, then add Mutalisk pressure as the second wave.
Coach point: Treat this as a reusable win template. Review Lair/Spire timing, first Muta target, and whether allies were ready to follow.
4. BGH 3v3 | WeiJia Terran | 18:58 Loss
Depot at 1:00, Barracks at 1:31, second Barracks at 1:58, Refinery at 2:49, Academy at 2:59, Stim at 3:52, Marine range at 4:46. The build flow is normal. The review should focus on first Marine/Medic position, ally timing, and defensive response after enemy tempo arrives.
Coach point: Terran role-fill review should not stop at Barracks and Stim timing. Ask what the first bio wave protected or pressured.
5. BGH fast game | WeiJia Zerg | 5:46 Win
Pool at 1:18, Extractor at 1:46, speed at 2:45, then multi-Hatch pressure around 4:49-4:52 and Lair at 5:22. This shows he can punish low-defense openings before the lobby becomes complicated.
Coach point: Keep this kill power, but define the switch point: if the opponent does not collapse, when do we stop forcing and expand the advantage?
6. BGH fast game | [24H]WeiJia Terran | 7:52 Loss
Depot at 0:52, Barracks at 1:24, second Barracks at 1:57, Refinery at 2:41, Academy at 3:03, Stim at 4:04, Marine range at 5:06. The flow is reasonable, but the game ends before bio is stable enough. This is a defensive timing and team rescue-window problem more than a build-order problem.
Coach point: Practice early humility as Terran. If the front is breaking, create a safe defensive position before continuing the default attack script.
7. Fighting Spirit 1v1 | [24H]WeiJia Zerg | 11:09 Win
Pool at 1:32, Extractor at 1:42, Hatchery at 2:29, Lair at 3:06, Spire at 4:12, Evolution Chamber at 4:31, then repeated anti-air structures. This is not a BGH-only habit. There is real normal-map Zerg structure and counterplay.
Coach point: Use this as a steady-pressure Zerg reference. WeiJia should not be evaluated as a pure mineral-map brawler.
8. Fighting Spirit 1v1 | [24H]WeiJia Zerg | 17:05 Loss
Hatchery at 1:42, Pool at 2:03, Lair at 3:07, Spire at 4:28, another Hatchery at 5:01, then heavy Overlord, Spore, and Creep Colony layering. The loss shape is defensive over-layering after being pressured.
Coach point: Defense is fine only if it buys a next action. After every extra defense layer, ask: did this buy drones, Mutas, Lurkers, or a new attack?
9. Polypoid 2v2 | Cwt)WeiJia Zerg | 17:33 Win
Double Hatch at 1:44, Pool at 2:05, Lair at 3:10, Burrow at 3:11, Spire at 4:38, Mutalisks at 5:57. This is a high-quality Zerg sample with structure: not just speed, but defense, Burrow, and air transition.
Coach point: Bring this structure back into BGH long games. The goal is not only a strong first wave; it is a second phase with shape.
10. Python 2v2 | WeiJia Terran | 12:59 Loss
Depot at 0:53, Barracks at 1:27, Refinery at 1:42, Factory at 2:37, more Factories after 3:16, Vulture speed at 4:23. This is an aggressive Factory/Vulture idea, but the mobility does not fully become map control.
Coach point: Terran mobility needs a destination. Where did the Vultures go, what space did they buy, and what did the ally gain from it?
30-Day Plan
| Week | Theme | Completion Standard |
|---|---|---|
| 1 | Zerg second phase | After every speedling/Muta advantage, record drones, Overlords, defense layer, and next tech. Review whether he still over-forces. |
| 2 | Loss-cutting | Mark the first 90 seconds after each failed attack. Decide whether the correct move was continue, drone, defend, switch lane, or wait for ally timing. |
| 3 | T/P defaults | Practice one Terran bio BGH default and one Protoss double-Gate Dragoon default. Reduce live improvisation. |
| 4 | Team sync | Before the first pressure wave in 10 games, call the target, timing, and what the ally should follow. |