Brood War / YueeR / Zerg transition follow-up.
YueeR 6:00 Transition Follow-up
Her feedback is accurate: after three-Hatch speedling pressure, the 6:00 next-step decision often becomes unclear. This follow-up tags 10 replays and gives a practical decision tree to test in games.
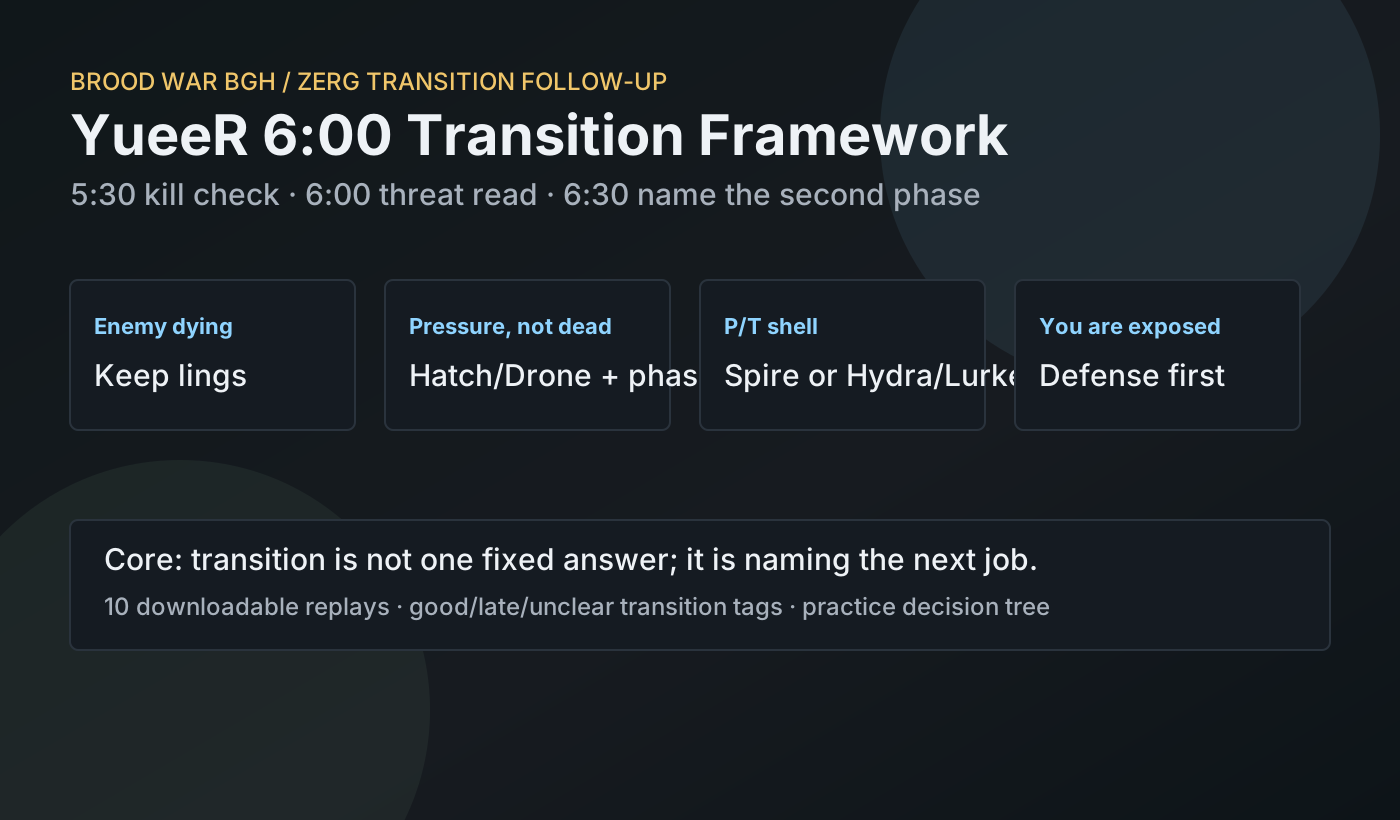
Decision Tree v0
If the enemy is dying, keep lings and finish. If not, enter transition mode.
Read the enemy threat: Protoss ground, Terran shell, Zerg air, or ally-defense need.
Name the second phase: Spire, Hydra/Lurker, economy, anti-air defense, or ally timing.
10 Replay Transition Reads
1. 38:18 Zerg Win · Good transition
Best long-game template. She opens Pool/Gas/Speed, adds Hatcheries at 3:11 and 4:09, then starts Evolution Chamber and air-defense layers at 5:45-6:34. This is exactly what her feedback points toward: after the dog flood, she creates a second body for the game instead of staying on pure ling pressure.
Coach read: Keep this replay as the model. At 6:00 the decision is not 'more lings forever'; it is 'I have pressure, now I need the layer that keeps me alive while my team scales.'
2. 27:54 Zerg Loss · Late transition
The opening survives, but the 6:00 shape is still mostly Zerglings plus static defense. Pool, Gas, Speed, early Sunkens and more Zerglings are all present, but the next weapon is not obvious enough. This is the common danger: she holds the front, then waits too long before making the game harder for the opponent in a new way.
Coach read: At 6:00, force the next label: Spire pressure, Hydra/Lurker ground lock, extra economy, or team-front timing. If the label is missing, the game drifts.
3. 19:47 Zerg Loss · Tech exists, job unclear
This one is useful because she does transition: Lair at 6:07 and Spire at 7:25. The weakness is not the tech timing itself. The question is whether the first Mutalisks have a concrete job: worker damage, tech denial, drop defense, or forcing a front retreat.
Coach read: Good first step, unfinished second step. Before Mutalisks pop, say the target out loud. A tech switch without a target often looks active but does not change the game.
4. 24:16 Zerg Loss · Survival without second weapon
This replay is the cleanest warning sign. Her first five minutes have defense, lings, Hatchery and Sunkens, but the exported timeline does not show the same early clear second weapon as her stronger games. In BGH, surviving the rush is only the entry fee; the Zerg still has to ask what threatens the enemy at 8:00-12:00.
Coach read: Use this as the review drill. Pause at 6:00 and write one sentence: 'My next damage source is...' If that sentence cannot be written, the transition is already late.
5. 8:00 Zerg Win · Short-game mature
This is the best short-game version. She still opens fast, but adds Hatcheries, Evolution Chamber and triple Sunken around 4:00. That means the rush has a counterattack insurance layer. This is different from pure gambling.
Coach read: If the opponent is dying, finish. If the opponent is not dying by 5:30, this same replay already shows the correct habit: add insurance before adding more greed.
6. 5:58 Zerg Win · No transition required
This is a pure execution win. Pool at 1:07, Speed at 2:15, constant Zerglings and extra Hatcheries end the game before the six-minute decision point. It is not a transition example; it is evidence that her first weapon is real.
Coach read: Do not over-correct this strength. The decision tree starts only when the opponent is not dead or the enemy counter-threat is visible by 5:30-6:00.
7. 16:26 Protoss Win · Off-race reference
This is not a Zerg transition replay, but it helps the framework. Her Protoss win shows that she can play a stable front when the role is simple: Gateways, Zealots, then Core. For Zerg, the equivalent is to make the second role simple too.
Coach read: Translate this to Zerg: choose one role, then execute it. Do not try to be ling flood, Muta harass, Hydra defense and economy all at once.
8. 20:08 Protoss Loss · Off-race warning
The Protoss loss shows the same pattern in another race: lots of early units and defensive structure, but a less clear midgame role. That is exactly the danger in her Zerg losses too.
Coach read: The framework should not be race-specific only. Her improvement word is role clarity: at the transition point, name the job before adding more units.
9. 10:08 Terran Loss · Terran loss-control reminder
This Terran loss shows why a decision framework matters. The build has Barracks, Bunker, Academy, Stim and Medics, but without a clear next defensive or positional layer, the game ends at 10:08. For Zerg, the same idea applies after three Hatcheries: production alone is not a plan.
Coach read: The shared lesson is simple: after the opener, the next layer must answer the opponent, not only continue your own build.
10. 11:18 Terran Loss · Tech gamble warning
This Terran tech route is bold: early gas, Factories, triple Starport and Wraiths. It is a useful warning for Zerg transition too. Tech is not automatically a good transition; it needs a target and a safety layer.
Coach read: A Spire without a target can become the Zerg version of this replay. Before the tech finishes, decide what it will kill, deny, defend, or force.